4 Essential Knots for Bass Fishing
When you first started fishing, you probably learned how to tie a basic fisherman’s knot. It’s the starter knot everybody learns to tie their first bait keeper hook on when their dad takes them out to catch their first bluegill on some wax worms with their first Zebco 33. If you’re just getting into fishing, you might not even know that one. That’s okay. We’re going to cover it.
However, making knots for bass fishing gets a lot more complicated than that, and over the last fifty years or so, anglers have really stepped up their game when it comes to creating new rigs, customizing traditional setups, and more. As such, plenty of knots have been developed, and each one does something a bit different.
Every angler should have several knots under their toolbelt. So, we’re going to go over the most useful knots, why you need to know more than just the basic fisherman’s knot, and some other tips and tricks.
Let’s get started.
Bass Forecast Newsletters
Why is it Important to Know Plenty of Knots?
If you’ve gotten away with using a fisherman’s knot for everything for years, you might wonder why you even need to worry about learning new knots. Well, different knots operate differently, and as you expand into new rig setups, fishing styles, and more, you might be forced to use something different.
For example, a fisherman’s knot can slip fairly easily in some rig formations, and that’s especially true if it’s not tied 100% properly.
So, here are some key points to consider.
1: Strength
When you’re catching bluegill and bream, you really don’t have to worry about this. Even most bass aren’t going to pull out a well-tied basic knot. However, as you start targeting larger fish, using rigs that put more stress on the knot point, etc, you will notice that your knots occasionally come undone, and you not only lose the fish, but you lose any tackle that was held on by that knot, too.
Some knots are stronger than others and can take a lot more stress before they slip out.
2: Placement
The knot you use affects the placement of your tackle, as well. For example, if you use a basic fisherman’s knot, whatever you tied on simply stays in line with the fishing line. However, with certain knots, we’ll talk about, you can offset the hook to be perpendicular to the line or even leave it secured but able to move independently of the line, as well.
Having that capability is absolutely necessary for certain rigs and techniques. So, by not learning new knots, you block yourself off from entire rig options and styles of fishing.
3: Complex Rig Construction
Not every rig consists of simply slipping a weight or bobber on and tying on a hook. There are rigs that let weights free-slide on the line, use multiple hooks that dangle off in multiple directions, place the hook far above the weight, etc. Each of those rigs requires special knots.
Top 4 Knots for Bass Fishing You Need to Learn
Alright, we’re ready to get into the different knots for bass fishing that every fisherman should master. Some of them will be go-to options every time you fish, and some of them will be special knots you just need to know when you occasionally switch things up for special occasions. However, if you don’t know them, you don’t even have the option.
Let’s take a look.
1: Fisherman’s Knot
This is the most basic fishing knot for bass fishing, and it’s used in all forms of rod and reel fishing. If you were ever taken fishing as a kid, you probably know this one. If you’ve never fished before and you’re looking for a primer before your first trip, pay close attention.
To make this knot, run the end of the line through the hook and give yourself about five inches of tag end. It’s easier to learn this knot if you give it a little more of a tag-end than the 2-3 inches most guides will tell you to use.
Now, with your hook dangling, you’ll have a downward-facing half-loop. Run the tag-end back up the line, fold it downward in half, and wrap the tag-end around both pieces of the line from the hook end upward. When you’re done, poke the tag-end through the upward-facing loop, and cinch the knot down.
This is also called a “hangman’s knot”. So, you’ve probably seen it used before in films or used it under that name for lifting things up or connecting things.
This is a great knot. There’s a reason it’s considered the primary fishing knot, and there’s no need to bash it just because stronger, more specialized, and more complicated, knots have been developed.
Anything you tie to this is going to hang downward in line with your line, and the movement of the tackle won’t be restricted hardly at all.
The only issue with this knot is that, under extreme tension, it can slip out. This is particularly common when it’s tied wrong, but a big, 15-pound, bass can work it loose if it thrashes enough.
This also depends on the line.
Mono and braid tend to have this problem the most. It’s not super common, but when it happens, it’s usually a pretty big disappointment. If you’re using expensive lures or rigs, or you’re using larger lures for bigger bass, you might want to try another knot to avoid this potential issue. Otherwise, it’s great for almost everything a beginner fisherman is going to do.

2: Double Fisherman
This is the exact same knot we just talked about, but it’s done twice, and it’s used for a very specific reason.
The double fisherman is often used to join two lines together. Such as when you want to put a leader on your line, or you’re spooling your reel and used a few yards of mono as a backing for the braid. Those are really the only two realistic situations in fishing where you will use a double fisherman.
For leaders, a lot of anglers use clips and other consumables to make it a speedier setup, but you still need to know this basic skill in case you need a leader and have run out of that terminal tackle.
To do it, you’re going to start by making a fisherman’s knot on your line just like we highlighted above. However, you shouldn’t cinch it down, yet. Instead, take your leader line, and put the end through the main loop of the primary line.
Proceed to make another fisherman’s knot with your leader line, and then cinch both knots down by pulling on the leader and the primary line at the same time.
This forms a strong connection without fattening up the line at the conjoining point too much. That’s key when you’re working with several yards of leader line and don’t want to reel hefty knots onto your spool. There are other ways to do this, but this is simple, effective, and a go-to option for the majority of fishermen.
3: Palomar Knot
This is a step up from the basic fisherman’s knot, and it’s awesome for tying on tackle that’s going to sit at the end of a rig such as a drop-shot weight or a hook in a standard Texas rig. It’s fast to tie, easy to learn, and extremely strong. It’s pretty much better than a basic fisherman’s knot in every way, but it’s a bit newer, and that’s why we’re putting it in the 3rd spot.
To make this knot, get plenty of tag-end ready. Try to grab about 7 inches up the line, and fold the line at that point. This gives you one big half-loop. Now, slip that half loop into the eye of whatever tackle you’re tying on, and pull it about halfway through. From there, treat the loop as a single “thread” and the tag end and main line as a single thread. Tie an overhand knot, but don’t cinch it down too tightly, yet.
Now, you’ll have a knot above the eye of the hook and a large loop. Take the pointy part of the hook, run it through the loop, and cinch it down.
This knot only takes a couple of seconds once you have a bit of practice under your belt, and it’s a major upgrade over the fisherman’s knot.
However, this knot becomes more difficult to pull off, and even impossible, when you use thicker lines on tackle that has tiny eyelets. For example, 30-pound mono on a standard bait keeper hook or drop-shot weight. That’s usually not a problem since tackle scales up in size together in most situations, but since you’re essentially doubling the thickness of the line, it can occasionally be a problem.
That is why you bother to learn the good old fisherman’s knot despite it being inferior.
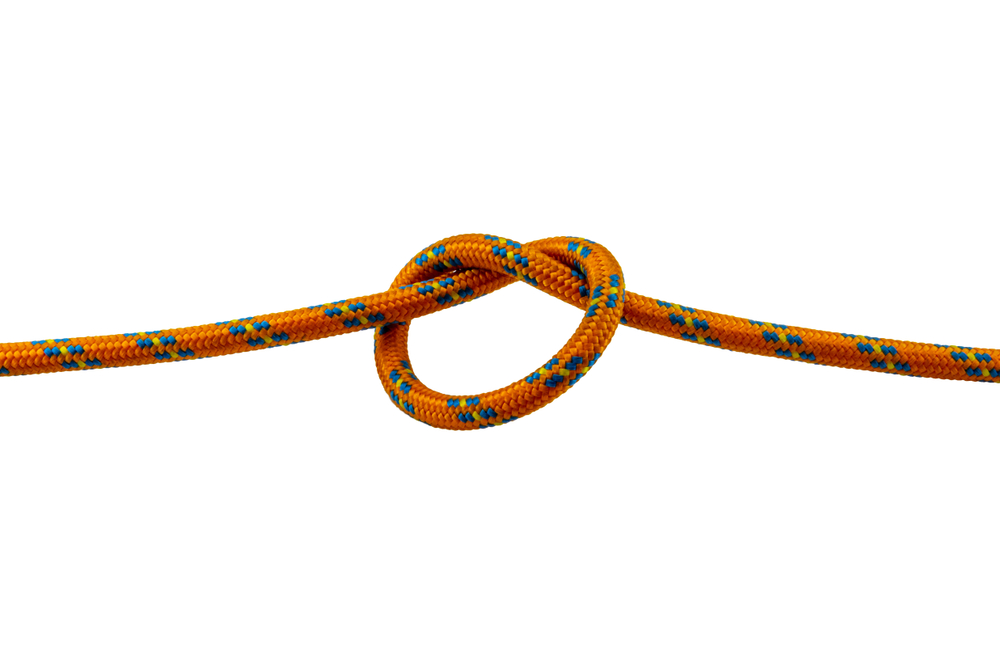
4: Overhand Knot
The overhand knot is as basic as it gets, but it’s extremely useful as a stop-knot. You can use it to stop a bobber, hook, sliding weight, or anything else, and it takes about two seconds to tie. You likely know it. You grab the end, make a loop, and pull the tag end back through the loop. Cinch it down, and you're ready to go.
This is way too weak to attach hooks and other things you don’t want to slide off your line, but as a stop-knot, it’s priceless. If you find that the small knot it makes isn’t enough to stop what you’re trying to block off, slide a cheap pony bead onto the line where you’re going to make the knot and make the knot around that.
You won’t need this all the time, but it’s priceless when you do need it, and it prevents you from having to use commercial stoppers and other convoluted nonsense.
Tips for Making Better Knots
Those are the most important knots for bass fishing you NEED to learn. There are others, but they’re usually hyper-specialized or convoluted with little retention for your time investment. You should still expand your horizons, though.
For now, we want to recommend some things that will help you make better knots.
1: Clip the Tag End
Always carry a pair of nail clippers on you while you fish unless you have a proper fishing plier with cutters on your belt. Whichever item you have, cut off the tag end that’s left after each knot. That makes it a lot harder for the knot to come undone, and it keeps your rig looking super clean.
2: Practice on Paracord or Nylon String
The knots we highlighted here can be mastered within about five minutes each. However, you should still practice before you hit the water. For that, we recommend using a paracord or nylon string. Both of those are a lot easier to see than your typical monofilament line, and you’ll be able to grab the “line” easier.
If you need to practice on a “hook”, make a big one with a large eye out of cardboard, plastic sheeting, or whatever garbage you have laying around. For multi-line knots, use a different color for each line. That’ll help create a visual differentiation while you’re learning.
This comes in handy when you move onto really convoluted knots. Trying to learn them on 12-pound mono is a pain, and even with brightly-colored braid, it can be difficult. Learn the basics at home while you’re watching TV or listening to a podcast, and you won’t waste time on the water tying crappy knots.
3: Keep Visual References
You should be able to remember all the knots we discussed without any problems, but as you learn more, try to print out visual references of each knot and slip them into your tackle box. When the time comes that you need a super convoluted knot for the first time in months, you can just reference the printout instead of struggling to get it right for minutes on end.
Check Out Bass Forecast for More Tips and the Best Fishing Companion
When you’re ready to learn about more knots for bass fishing, need tips for improving your bass fishing technique, or just want to get a top-of-the-line fishing companion to help you find the best spots, check out the Bass Forecast fishing app.
We’ve got all the bass information you could ever need, including tackle tips, detailed maps, in-depth real-time data, spot-on solunar, and more.

-1739275914.jpg)
.jpg)
.jpg)
.png)